“This world is but a canvas to our imaginations.” — Henry David Thoreau
Showing posts with label real life. Show all posts

Wednesday, December 16, 2015

Chocolate Peppermint Bark Cookies

aka Santa Claus Cookies! These cookies are perfect for the holidays.
I'm baaaaack! I have taken a rather long hiatus from blogging. And I might take another hiatus after this post, but I'm feeling very Christmas-y at the moment. One thing that is an essential part of my holiday season is baking and treat making. I made these cookies today, and I couldn't wait to share the recipe!

If you know me at all, you know I enjoy choose-your-own-adventure type recipes; that is, recipes that are easily changed and adapted. As such, I will post a few alternatives to this recipe below. The dough is my favorite for chocolate cookies, and you can enjoy so many different versions depending on what you add: different flavored baking chips, candy, nuts...I love all the possibilities!

Chocolate and mint is kind of a hit-or-miss combination for me. I don't always love it, and in the past I haven't been a big fan of peppermint bark. It just wasn't my cup of tea. However, I find that this year I love those flavors together! I don't know what it is, but I can't get enough. And thus these cookies were born.

(with Andes Peppermint Crunch Baking Chips)
I used Andes Peppermint Crunch baking chips, but you can use any peppermint bark you like for this recipe. Just chop it up and toss it in the bowl. One 10 ounce bag was just slightly less than 2 cups. You could also use Dove Dark Chocolate Peppermint Bark Promises or Hershey's Candy Cane bars, for example. You could even chop up homemade peppermint bark! I have a couple more options at the bottom of the post. (See what I mean about the choose-your-own-adventure stuff?)

I garnished my cookies with some White Peppermint M&Ms, but that is optional.
(with White Peppermint M&Ms)

The red and white M&Ms make these look like Santa Claus cookies to me, and I almost named them that. They are so cute and tasty! I happened to find this Santa Claus plate in my mom's Christmas box (thanks mom!):
These "Santa Claus" Cookies are perfect for Christmas!

It was too perfect for these cookies! I hope you enjoy them too :-)


Chocolate Peppermint Bark Cookies (Printable Recipe)
recipe by Sara (stuff-by-sara.blogspot.com)

1 cup butter, softened
2 cups sugar
2 eggs
2 teaspoons vanilla extract
2 1/4 cups flour
3/4 cups cocoa powder
1 1/2 teaspoon baking soda
1/2 teaspoon salt
2 cups coarsely chopped peppermint bark
1 bag White Peppermint M&Ms (optional)

Preheat oven to 350 F.

Start by creaming together the butter and sugar with a mixer. Add eggs and vanilla and mix thoroughly. In a separate bowl, whisk together the dry ingredients: flour, cocoa powder, baking soda, and salt. Pour dry ingredients into the creamed mixture and mix to combine. Add chopped peppermint bark and gently mix.

Scoop dough by large spoonfuls onto a greased cookie sheet (I used a cookie scoop). Press a few M&Ms onto each cookie if desired.

Bake for 8-10 minutes, then transfer to a cooling rack.

Enjoy!

aka Santa Claus Cookies
Alternate versions

Candy Cane Kiss Cookies: Make dough as directed, but leave out the peppermint bark. Scoop cookies onto the cookie sheet and bake as directed (leaving off the M&Ms). While cookies are still warm after baking, press an unwrapped Hershey's Candy Cane Kiss into each one. You could also use Mint Truffle kisses for a slightly different chocolate/mint flavor. For that matter, you could use really any flavor kiss you like (double chocolate kiss cookies, anyone?).

Chocolate Peppermint Chip Cookies: Substitute 1 1/2 cups white chocolate chips and 1/2 cup crushed candy canes for the peppermint bark. Omit M&Ms. Make cookies as directed.

Turtle Cookies: Omit peppermint bark and M&Ms. Add 1 cup chopped pecans to dough. Unwrap 3 dozen Rolo candies. Measure 2 Tbsp of cookie dough. Place a Rolo in the center and cover with dough. Bake as directed.

Chocolate Cherry Chip Cookies: Instead of peppermint bark, add 1 cup cherry baking chips (like these or similar) and 1 cup white chocolate chips. Omit M&Ms. Bake as directed.


You can certainly use this dough with any number of other combinations. Have fun with it, and maybe try something new!

Merry Christmas!

Monday, July 14, 2014

Summer Sun

I love summertime. The sun, the warm weather, the icy cold treats, the flip-flops, the road trips, the beach. A few weekends ago, I went to the beach (Panama City, FL), and it occurred to me that I should share some of my summer essentials.

I'll start off by saying that I am incredibly fair-skinned. Think the girl in this meme:


As such, sun protection is a must. Neutrogena is my favorite sunscreen: it stays on well (even when swimming--it's water resistant for up to 80 minutes), it doesn't clog my pores, and it offers great sun protection. I like SPF 45 or higher. If you're swimming for a long time (like a whole day at the beach) reapply every hour or so. If you are trying to get a tan, I still recommend using sunscreen SPF 15 or higher. I got a (slight) tan using SPF 45.

If your sunscreen fails you, I have a great remedy for sunburn: freshly grated potatoes. What? I know, it sounds totally weird, but my mom came across this remedy while taking a free class on medicinal uses of herbs. I got a bit of sunburn while in Florida, but my brothers got it pretty bad (especially the one who refused to use sunscreen--he was trying to get a tan). Amazingly, the potatoes made a noticeable difference both in skin tone and in relief. My brother's back literally changed from a deep, angry red to a lighter pink. On my own back, the grated potatoes were surprisingly cold, which helped a lot with the pain. We used both russet and red potatoes, so I imagine that other kinds would work, too. Use whatever you have on hand.

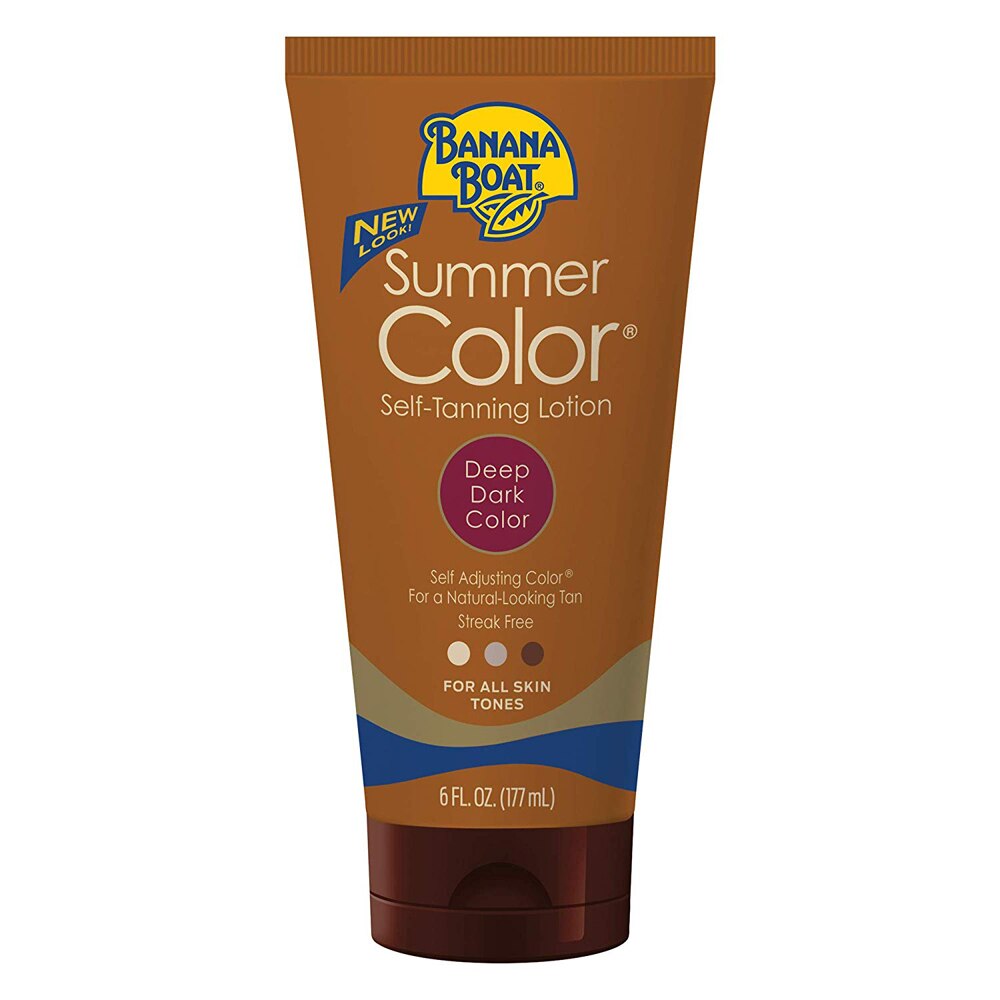
Since I don't tan well (see meme above), sometimes I opt for the fake stuff. Enter: Banana Boat Summer Color Self-Tanning Lotion. It's cheap, and it looks fairly natural. I even tried the Deep Dark Color version (I couldn't find the Light/Medium kind), and it didn't turn my skin orange. That is a win, ladies and gentlemen.

This next one might be a bit controversial, but I just can't help myself: I have used Sun-In every summer since I was 12 years old. It's tradition. It's also one of my favorite parts of summer: My dingy blonde locks turn into brilliant blonde tresses. My hair bleaches quite a bit in the sun naturally, so I only use Sun-In once or twice at the beginning of the summer to give my hair a kick-start. Using this product too often can result in serious hair damage, or so I have heard. Moderation is the name of the game, folks.


Since hair damage is a concern in the summer time, let's talk about hair protection. My hair is pretty delicate (I'm a natural blonde, what can I say?), so it easily gets dried out in direct sunlight. I have heard that you can spray aerosol sunscreen on your hair, but I find that a bit heavy and greasy. Instead, I like to mix up custom solution. Feel free to change the recipe to suit your needs.
     2 Tbsp sunscreen lotion
     1 Tbsp conditioner
     1 Tbsp hairspray or gel (optional)
     1 cup of water.
Shake it up and spritz. Works wonders.

Another helpful hint: protect your locks in the pool by putting a little bit of conditioner on the ends of your hair before taking a dip. I like Aussie 3 Minute Miracle, but any conditioner will do. You'd be amazed how much this helps keep my hair from drying out due to the chlorine. It also builds a barrier so my hair won't turn green. #blondegirlproblems

Just one more tip: If you are spending a lot of time outdoors in the heat, be sure to drink plenty of water. I got a bit dehydrated at the beach, and I had a wobbly walk to the car. My favorite water bottle is one by Camelbak. Fun fact: if you drink through a straw, you consume more liquid because there are fewer air bubbles. Straw or not, stay hydrated.

Enjoy that summer sun!

Sunday, May 11, 2014

Book Club catch-up

I have been a terrible blogger as of late. Life has been busy (out-of-town trips, new jobs, various projects, etc.). I'm trying to catch up, however. Starting with book club.

I never officially selected a book for April because I was finishing up a few series I started a while back (Blackmoore, Allegiant, Extras). I hope you had a chance to read something worthwhile, too. I retroactively declare April "Pick Your Own" month. A cop-out, I know, but that's how the cookie crumbles.

Now that May is well under way, my choice for the month is
Tess of the d'Urbervilles
by Thomas Hardy

From Goodreads: "The chance discovery by a young peasant woman that she is a descendant of the noble family of d'Urbervilles is to change the course of her life. Tess Durbeyfield leaves home on the first of her fateful journeys, and meets the ruthless Alec d'Urberville. Thomas Hardy's impassioned story tells of hope and disappointment, rejection and enduring love."

From Barnes & Noble: "A ne'er-do-well exploits his gentle daughter's beauty for social advancement in this masterpiece of tragic fiction. Hardy's 1891 novel defied convention to focus on the rural lower class for a frank treatment of sexuality and religion. Then and now, his sympathetic portrait of a victim of Victorian hypocrisy offers compelling reading."

This book is available from Project Gutenberg! In case you didn't know, that means you can read Tess of the d'Urbervilles for free! You can download an ebook (.epub or .mobi), or you can read it online. Neat, huh? You can also get the Kindle edition free from Amazon. Or, you know, you can borrow a hard copy from the library (which is what I usually do). So many options.

This book gets an average rating of 3.70 stars on Goodreads, 4.1 stars on Amazon, and 4 stars on Barnes & Noble. I hope I enjoy it as much (and you, too).

I'll see you next month! I promise to come back this time ;-)

Wednesday, January 22, 2014

Neat Gifts for Newlyweds—Twenty Bucks or Less

I don't know about you, but I've been invited to 4 weddings that took place within the last month, and I know it won't stop there. Valentine's Day is quickly approaching, which means wedding season is well on its way. If you need some gift ideas for the newlyweds, you've come to the right place!

Most newlywed couples are fairly young, which means their close friends are probably fairly young, too. Fairly young often means fairly poor (or at least it does in my case). That's why everything on this list is $20 or under.*

If you are looking for a nifty gift that both practical and unique, this is the list for you. If you are a newlywed, these might be items you didn't think to register for. Either way, this is a list of useful stuff that won't break the bank.

OXO Good Grips Adjustable Measuring Cup. A.K.A. measuring cup for sticky stuff—great for corn syrup or peanut butter, but you can also use it to measure ingredients like flour and water. I love a multitasker! This will adjust to any measurement you need up to one cup. These come in adjustable two cup and ⅛ cup sizes as well. Available from Amazon for $6-12 (depending on size). A similar measuring cup is available from Pampered Chef, if you prefer.

Joseph Joseph Adjustable Rolling Pin. This rolling pin makes it easy to roll dough to a uniform thickness. Plus, the one with multi-color discs is cute (it also comes in grey and putty color schemes). Available from Amazon for about $20.

Norpro Flexible Cutting Boards. I love these babies. They make it easy to cut, transport, and pour ingredients. Set of 3 available from Amazon for about $6.

AccuSharp Knife Sharpener. The newlyweds might get some nice cutlery, and they'll want to maintain those sharp edges. This sharpener is recommended by America’s Test Kitchen. I always trust recommendations from ATK. Available from Amazon for about $9.

Microplane Zester/Grater. Completely awesome for zesting lemons or grating nutmeg. It will also give you super-fine shreds of parmesan cheese. It will feel like you are at the Olive Garden...except this isn’t the grater they have at the Olive Garden. Even so, this is a truly magical tool. Available from Amazon for about $13.

Ball Plastic Storage Caps. Since Mason jars are all the rage, why not get some storage caps for those suckers? These plastic caps are great for fridge or freezer storage, and they won’t rust. They come in both regular and wide-mouth sizes. Set of 8 available from Amazon for $3-4.

Perfect Grip Nail Clippers & Tweezers Set. Everyone uses nail clippers, but not everyone will splurge to get some nice ones. My sister and brother-in-law like this set. He says these clippers are easier to grip with his pudgy fingers...er...large man hands. Available from Drugstore.com for about $6. I’ve also seen them at Walmart.

Folding Board. Just like Sheldon Cooper’s. This is a neat tool for perfectly folded clothes with no hassle. Available from Amazon for about $8.

Kikkerland Hedgehog Dryer Balls. These little guys replace dryer sheets. They reduce static and improve airflow in the dryer. Use them over and over again. You can find plain dryer balls that serve the same purpose, but these hedgies are so darn cute. Set of 2 available from Amazon for about $7. Puffer fish dryer balls are available now, too!

Personal Library Kit. This one is a little quirky. The set includes self-adhesive pockets and check-out cards, just like a real library! It also comes with a pencil, adjustable date stamp, and ink pad. Perfect for merging his and her book collections (or his and his or hers and hers as the case may be). If you’re not a true book lover, you won’t see the appeal. If you are a bibliophile, you want one yourself. Available from Amazon for about $12.

Pilot G2 Pens. The new couple will have a lot of thank-you notes to write, and these pens are reliable. A bit pricey, but they last a long time and write consistently. Plus, the newlyweds can buy ink cartridge refills instead of buying more pens. Savings! Box of 12 available from Amazon for about $14. Of course, smaller packages are available for cheaper. I’ve seen these pens at Target, Walmart, Staples, and Office Depot. I linked to the 0.7 mm tip size, but they are available in 0.38 mm, 0.5 mm, and 1.0 mm also. Sometimes you can find them in fun colors, too.

Postage Stamps. Also for thank-yous. Sometimes the small things are the nicest to have around. Booklet of 20 available for under $10 from USPS.

Happy Gifting!

*Please let me know if any of these prices have changed, and I will update this post. Thanks!

Tuesday, January 7, 2014

Cold & Flu Season Essentials

Let me tell you a story. Once I came down with an awful stomach bug. My supply of food stuffs was all but depleted.  I lived alone, and I didn't have the energy to go to the store for Sprite or saltines. Long story short, now I keep a few things on hand for when illness strikes--because it's always unexpected. Here are a few of my staples for the cold and flu season:

Homeopathic Remedies
Personally, I'm a big fan of Oscillococcinum. You take it when you first start experiencing flu-like symptoms. Similarly, Zicam is marketed as a pre-cold remedy. I haven't tried Zicam, but I'm in favor of anything that will alleviate symptoms at the onset.

Waterless Vaporizer
I have a Vicks Waterless Vaporizer, but I have also used one made by PediaCare. Both are great. They release menthol vapors into the air. When I have a cold, I have trouble sleeping at night. Sometimes cold symptoms make it hard to breathe. These vaporizers have helped me a great deal.

Fluids
Drinking lots of fluids is always important. Dehydration is a serious concern, especially if you have the flu. If you have the stomach flu, clear liquids are preferable: water, white grape juice, Sprite, 7-Up, ginger ale, Pedialyte, etc. I like Powerade or Gatorade on ice. Just remember to sip slowly.

Bland Foods

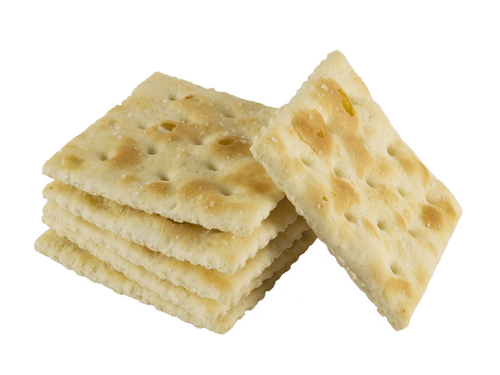
My mom has always recommended the B.R.A.T. diet: bananas, rice, applesauce, and toast. I like saltines, and I always keep a box in the pantry. You might prefer pretzels, tortillas, graham crackers, Cheerios, or any number of other things. Just keep some around the house in the event of illness. Believe you me, you won't want to go to the store when you are ill.

Hand Soap

According to the CDC, clean hands save lives. Hand washing is "one of the best ways to remove germs, avoid getting sick, and and prevent the spread of  germs to others." Wash, wash, wash!
When you are out and about, carry some alcohol-based hand sanitizer (at least 60% alcohol). If soap and water aren't available, hand sanitizer is your best bet.


I hope you don't get sick this cold/flu season. But if you do, a stockpile of supplies will ease the burden. If you do get sick, go to a doctor. The products listed above won't cure your ailment.

And for heaven's sake, stay home! You need your rest, and the rest of us don't need your germs.

Wednesday, July 17, 2013

Watercise! Tips for Working Out in the Pool

(source)
I pretty much love the water, especially in the summer. Bonus: I can get my work-out on in the pool!

Enter: Watercise! The swimming sensation that's sweeping the nation!

Just kidding. But with spectacles like Prancercise, it seemed a fitting title.

In all seriousness, there are many benefits of swimming, including lower impact on joints and increased muscle tone and strength due to the resistance of the water. For me, that translates into more bang for my buck with less pain. Bonus: I'm not hot and sweaty at the end of a work out. That makes the whole thing seem much more do-able.

Even more than the potential benefits, I actually enjoy swimming. In my opinion, this is the most important factor for establishing a consistent work-out routine.

I'll tell you what I mean.

Rewind a couple years. I signed up to run a 5k with some friends. I had a few months to prepare, so I faithfully got up in the mornings and jogged. I strictly adhered to a training schedule I found online (and a really easy one at that), but running/jogging just made me want to die. Seriously. I was always red-faced and out of breath. I didn't want to be embarrassed at my 5k, so I continued on. And on. And on. For three months.

Finally the day of my 5k arrived: I was a snail compared the rest of my team! Even after all that work!

So what did I do? I promptly stopped jogging. And I've never gone back. For a while I took long walks instead, but even that waned over time.

Now that it's summer, I've started swimming and water aerobics. Swimming is lovely. The water is both refreshing and relaxing. Basically, I love getting in the pool.

So what is my routine like? I usually start by walking a few laps. Yes, walking. This is more of a warm-up, but even walking in the pool can be more beneficial than walking around the block. Why? Water resistance. The resistance of the water helps to build and strengthen muscles. Which sounds wonderful to me.

I have a smallish above-ground pool, so I walk the circumference of it. I start by the ladder, walk once around clockwise, then when I get back to the ladder, I change directions. This keeps the water from forming a whirlpool that I can just coast on. Instead, I am working against the water, maximizing my work-out.

Next I do a few laps of whatever I feel like. I'm not really a swimmer in that I never learned how to swim. I just kind of flail my limbs until I get where I want to go. I probably look kind of goofy, like this guy:
(source)
But I don't let that bother me. I usually do about 10 laps of swimming regularly, then I switch to just swimming with my arms (keeping my legs straight behind me), then a few with just my legs (holding a kick board or some such). Maybe some backstroke thrown in there.

I also like to do some of the exercises in this Total Body Pool Workout. All you need is a beach ball. And, you know, a pool. My pool isn't deep enough for all of these exercises, but I do what I can. You can look up other exercises on the internets. I loves the internets!

I finish up by stretching. Not all stretches are convenient in the water, but here are some of my favorites:
 • Neck side stretches - Place your left hand on the top of your head and slowly tilt your head to the left. Apply gentle pressure with your hand to increase the stretch. Hold for 30 seconds. Repeat on your right side.
 • Calf stretch - Face the wall of the pool. Step back with your right foot, keeping your left toes next to the pool wall. You want your left leg bent and right leg straight. Make sure your right foot is flat on the pool floor. Keep your hands on the pool wall, and lean forward. Hold for 30 seconds, then switch to the left.
 • Shoulder stretch -  Bring your left arm across your body and hold it with your right arm, either above or below the elbow. Hold for about 30 seconds. Switch arms and repeat.

If you are considering moving your usual work-out to the pool, I suggest the following:

1. Stick with it, and don't get discouraged. Exercise only helps you if you do it! Of course, sometimes you will have setbacks. A few days ago I woke up to thunder and pouring rain. I was really looking forward to my pool time, but I had to postpone it. Sometimes life gets in the way, but do your best be consistent.

2. Remember something is better than nothing. Even if you just go out and swim a few laps, that's better than not doing anything at all.
(source)
3. Use sun protection. Again, my pool is outside, so I use plenty of sunscreen before heading out for a swim. If your hair gets sun-dry, try smoothing a little sunscreen through your hair. Works wonders. You can also put a little bit of conditioner on the ends if the chlorine tends to dry it out.

4. Buy some swimmer's ear drops. Without them, swimming would be just as miserable as running (for me).

5. Do whatever will make you more comfortable in the water. If you need a pool noodle or something else to hold on to, do so. If you like swim caps and goggles, wear them. I hear that some people like nose plugs and/or ear plugs.

6. Have fun! Maybe take a few underwater selfies while you're at it.

If swimming isn't your thing, try something else. But don't stick with any routine that makes the grim reaper seem like an attractive fella.

Monday, May 20, 2013

My Favorite Cleaning Supplies

Cleaning. I know, I know: not the most exciting topic in the world.

But...

I love cleaning. Or rather, I love having clean things. Like, I really love it. Even so, I'm really not a clean freak. I am, however, really opinionated about which cleaners I use. Mostly because I have spent so many hours scrubbing and using mediocre products. Use the right product, and life becomes So. Much. Easier. I just didn't know what to buy. The madness stops here because I am letting you in on my most prized secrets: my favorite cleaning supplies. Here they are (in no real order):

Clorox Toilet Bowl Cleaner - Clinging Bleach Gel

(source) 
Make sure you get the clinging bleach gel kind. It's important. Mostly because it works 1,000,000,000 times better than the other kinds from Clorox. It's also my favorite compared to other brands. I like to scrub the toilet in the evening, right before going to bed. Here's the important part: after scrubbing, I let the cleaner soak all night. I've even been known, on occasion, to squirt the cleaner and just leave it overnight. No scrubbing. Just flush in the morning, and your toilet is sparkly clean. As it should be.

While we're on the subject of Clorox, let's get this out of the way...

Clorox Wipes - Orange Scent
(source)
I love disinfectants of any kind because they put my mind at ease. I mean, really, what is the point of cleaning if you aren't getting rid of germs and bacteria? I especially love Clorox wipes. Any Clorox wipe will do, but the orange scent is my fave. These wipes are great on a multitude of surfaces, and they are just so darn convenient. Love 'em for every room.

DIY Floor Cleaner (as found on Pinterest)
(source)
The picture has washing soda in it, but I use baking soda, like the description says.  It works great! I also add blue Dawn, which I maintain is the best liquid dish soap.
I love this floor cleaner. Love, love. It cleans really well without much scrubbing, and there is no film or residue left behind (which happens to be my biggest complaint with most commercial floor cleaners).    I have never had any problems with this solution, but my mom (who has a mop similar to this one) said that the baking soda tends to clog the spray head on her mop. I don't have a fancy spray mop, so I've never had a problem. A good old mop-and-bucket works just fine with this solution. I also like this as a multi-purpose solution. Mix up a bucket, and wipe down counters, sinks, etc.

Original (blue) Dawn Dish Soap
(source) 
My mom has always bought blue Dawn. It is a wonderful degreaser and cleanser. And it is cheap! Score! I learned during my college years that not all dish soaps are created equal. I tried a few too many duds before I realized that my mom bought Dawn for a reason. Ever since I figured out that Dawn is both awesome and affordable, I have never bought anything else. I use Dawn for dishes, but also for homemade cleaners like the one above. Dawn is also an excellent laundry pretreatment for oil/grease stains. Blue Dawn gets my recommendation 110%.

DIY Shower Cleaner (as found on Pinterest)
(source/source)
This shower cleaner is bomb. Seriously. It gets rid of soap scum buildup like nothing else I've seen. I provided in-home care for an elderly man for some time, and one of the services I provided was home cleaning. I have no idea when his showers were cleaned before my employment with him, but I tried everything to get those glass doors transparent again. This cleaner finally worked--and worked well. It didn't take a lot of scrubbing, and those shower doors were shiny--no streaks left behind! The only problem I have with this cleaner is the smell. I hate the smell of vinegar, and this smells really strongly. But hey, it gets the job done.

Baking Soda
(source) 
Baking soda is another great multi-purpose cleaner. You can add it to homemade cleaners, like the floor cleaner above. You can also use it as a laundry additive--it really boosts your detergent's cleaning power in my opinion. Baking soda is awesome at getting rid of funky smells. Keep a box of baking soda in your refrigerator, and strong food smells won't linger. You can also sprinkle baking soda over carpet or furniture to rid them of odors. Just vacuum it up afterwards. I usually give the baking soda some time to work, maybe half an hour to an hour, before vacuuming. Baking soda is mildly abrasive, so you can also use it to scrub stubborn, grimy surfaces, especially in the kitchen.

Arm & Hammer Liquid Laundry Detergent plus OxiClean
(source)
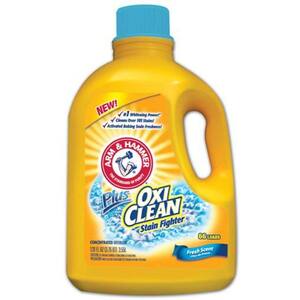
Love this stuff.  I have super sensitive skin, and changes in laundry detergent or fabric softener can be catastrophic. I used to use solely Tide, which is a great laundry detergent, but it is pricey. I was terrified to try anything else because of my past experiences (like hives covering my entire body). I finally gave Arm & Hammer a try because the box said it was dermatologist tested. And whaddaya know, no hives! I have been using it ever since. I prefer the liquid to the powder, and I really like the ones with OxiClean. My favorite scent is the one with the blue lid. I know there are lots of homemade laundry detergents out there, but I can't give you an opinion because I haven't tried them (see: fear of hives).

Playtex Living Gloves
(source)
I like to wear gloves when I clean, especially if I am going to spend some time scrubbing. This is more of a personal preference than anything else. I just hate trashing my nails while cleaning, not to mention my skin. These particular gloves are a bit thicker than your average yellow rubber gloves. The extra thickness helps shield my hands from the heat of scalding water. The cuff is longer, too which means extra protection again. I have a pair for kitchen use and a separate pair for bathroom cleaning. (I labeled the bathroom pair with a Sharpie, so I don't get them confused. Because that would be grody.) The Playtex Living gloves are durable, they don't rip or tear like some other gloves I've tried. Seriously, they are the best.


What about you? What are your favorite cleaning methods/products?

Saturday, May 11, 2013

Happy Mommy Day! (French Silk Pie Edition)

This is my present to my Mom this Mother’s Day: 

Just a small portion of my efforts.
The ♥ is because it was a labor of love.
I chopped, packaged, and froze approximately 6 pounds of onions. Weird gift? Maybe. But not if you know my dear Madre. My Mom despises fresh onions, or so she says. In reality, my Mom likes cooking with onions and does so frequently. What she hates is cutting them up--they make her eyes water terribly.

The aftermath. 
I would sympathize, but somehow I have the super-human ability not to tear up around fresh onion. And thus my somewhat odd Mother’s Day gift.

Anyways. Enough about onion.

Instead, let's talk about dinner. On Sundays my Mother hosts family dinner (including all of my siblings+spouses+children), and we invite 2 missionaries from our church. Lately, that means 10 people (11 if you count my niece, but she can't eat solid food yet).

This is sometimes stressful on my Mamacita, so my older brother and I decided we’d make dinner this week.  We're having a smorgasbord of butterfly shrimp, fresh spring rolls, quinoa salad, cantaloupe, cucumber, and a few other oddities added in. (We’re about pleasing people here, not making cohesive meals).

For dessert, I decided to make one of my specialties: French Silk Pie.


Mmm. Just thinking about it makes my mouth water (literally). My Mom looooves chocolate, so I thought this pie would fit nicely with our Mother’s Day dinner. French Silk Pie is a chocolate mousse pie that has a light and silky texture but rich, decadent flavor. It is a favorite of mine, for sure. This recipe in particular suits my mom because you cook the eggs, which isn't very common in this type of pie.

It takes some extra time and TLC to make this award-winning dessert, but the result is worth the effort. If you want to make it yourself, here is the recipe:


French Silk Pie 
Recipe adapted from Taste of Home

1 prepared pie crust*
2/3 cup sugar
2 eggs
2 oz unsweetened chocolate, chopped
1 tsp vanilla
1/3 cup butter
1 cup heavy cream
2 Tbsp powdered sugar
whipped cream (optional)
your choice of garnish (optional)

In a small saucepan, combine sugar and eggs. Cook over low heat, stirring constantly, until the mixture reaches 160°. Remove from heat; add chopped chocolate and vanilla. Cool to 90°, stirring occasionally.   (This will take a little while, so go watch an episode of The Big Bang Theory. Or read a chapter of Fablehaven).

In a bowl, cream butter. Add cooled chocolate mixture and beat on high for 5 minutes.

In another bowl, beat cream until it begins to thicken. Add powdered sugar and continue to beat until stiff. Gently fold whipped cream into chocolate mixture. Once combined, spread into prepared crust. Refrigerate for 6 hours before serving (I usually shoot for overnight, if possible).

My unadorned pie
If you want to stop there and start eating, that is fine and dandy.

However, I like to top this with whipped cream because it looks pretty, and it counterbalances the richness of the filling. If I'm in the mood, I pipe the whipped cream on the pie with a fancy-dancy star tip. If I'm not in the mood, I just smear it on with a spatula.

I'm always in the mood for a little extra garnish, though. I think it gives this pie a little extra somethin' somethin'. Garnishes I have used in the past include miniature chocolate chips, chocolate jimmies, chocolate shavings (made using a chocolate bar and a vegetable peeler), and a chocolate drizzle. You can use whatever you like. My choice usually stems from what is already in my pantry.

whipped cream and chocolate curls
*You can use whatever kind of crust floats your boat. In the past I have used graham cracker, shortbread, chocolate wafer, and traditional pastry crust. You can even buy a pre-made pie crust if that makes you happy. This time around, I used a homemade traditional pastry crust.