“This world is but a canvas to our imaginations.” — Henry David Thoreau

Monday, July 29, 2013

ECKSDOT Review, New Book-of-the-Month Pick, and a Birthday Wish

Welcome back to the Book Club! First on the agenda: ECKSDOT  by J Washburn. 

If I had just read the book description, ECKSDOT probably wouldn’t have made it on my to-read list. However, there are more variables at play. For example, I know the author. He’s someone I respect a great deal. I thought I would enjoy his book because he is both clever and enormously creative.

If that weren’t reason enough, I also read this post on author J Washburn’s blog. The part that really caught me: "I think [J.K.] Rowling is leagues beyond me in her characterization. (And I include BACKSTORY as part of that.) But I think I could outdo her in plot." I don’t know if he was referring to ECKSDOT when he wrote that (he has other books in the works), but I have been burning with curiosity ever since.

Curiosity didn't kill this cat, since I was able to snag a copy for free.

I like Nate as a main character. Throughout the book, I was conscious of his age as well as challenges and restrictions associated with his youth. He has parents, just like any kid. He has to go to school. He has a secret crush on a cute girl. He has a playground nemesis. He shares a room with his brother. He has a wonderful imagination. Overall, he is a very relatable character.

The title character Ecks, or Ecksdot, is harder to describe. For a long time, I didn't really know what was going on with Ecks. I thought it was weird how he seemed to be narrating, but he constantly addressed Nate as “you”. Of course, the reason for this became apparent about 3/4 of the way through the book.

I'm still a little unsure as to how drawing a continuous line on his body enabled Nate to see another dimension. Similarly, I wish the "butterfly lady" had a larger role. She helped Nate become a Nexus, but (like I said) I'm still not sure how that even happened.

I liked the illustrations dotted throughout the book. Toward the beginning of the book, some of the descriptions were a little lost on me, so the illustrations were helpful.

Most of the other-worldly rules and such were introduced a little at a time, making it easier to digest.

The chapter headings drove me crazy. One or two letters in gray, the rest in black (e.g. Chapter 3: Danny’s Nonsense, o in gray). I’m positive it means something, but I don’t know what.

ECKSDOT
 is the first in a series. I didn’t know that going in, so I was looking for a more complete ending. As it happened, I turned the last page before I found out there that will be a sequel.

I think this book is well-suited to pre-adolescent and adolescent boys, especially ones with big imaginations. Fitting, since this is a YA (young adult) book.

Subsequent books might prove to be more intriguing, but this one rates average for me.


On to next month! My book choice for August is
The Anatomy of Peace
by The Arbinger Institute

This pick, funny enough, is inspired by J Washburn. Every year for his birthday, J invites his friends to read The Anatomy of Peace. His birthday, like mine, is in July. As such, he usually asks that friends and family read The Anatomy of Peace during the month of July. I'm a little late to the party, but I'm issuing a similar invitation.

My birthday is tomorrow. As a gift to me, I invite you to read The Anatomy of Peace during the next month.

I have read this book before, and I was impressed enough that I bought it. I haven't gotten back to it in a few years, so this will be a good refresher for me.

From Goodreads: Written as an engaging story, this book shows how mistaken views can cause people to misread situations and exacerbate the issues they wish to improve. Arguing that it is only after they understand themselves and get their internal house in order that they can correctly confront external conflicts, the book shows what can be done to make that happen, and how to make inner peace a potent tool for achieving outer satisfaction.

This book is sort of a prequel to Leadership and Self-Deception, which was also written by the Arbinger Institute. Leadership and Self-Deception is a wonderful book. It focuses on interpersonal relations within the workplace. The Anatomy of Peace deals with a similar topic, but with wider application.

From Publishers Weekly (as found on Amazon.com): The premise of this follow-up to Leadership and Self-Deception is simple: people whose hearts are at peace do not wage war, whether they're heads of state or members of a family. In this semi-fictional narrative ("inspired by actual events") illustrating the principles of achieving peace, the setting is a two-day parent workshop at an Arizona-based wilderness camp for out-of-control teenagers, but the storyline is a mere setting for an instruction manual. Workshop facilitators Yusuf al-Falah, a Palestinian Arab whose father was killed by Israelis in 1948, and Avi Rozen, an Israeli Jew whose father died in the Yom Kippur War, use examples from their domestic lives and the history of their region to illustrate situations in which the normal and necessary routines of daily life can become fodder for conflict. Readers observe this through the eyes of one participant, a father whose business is in nearly as much trouble as his teenage son. The usefulness of the information conveyed here on how conflicts take root, spread and can be resolved more than compensates for the pedestrian writing. 

I hope you choose to read with me :-)

Tuesday, July 23, 2013

Sweet & Crisp Granola

I've been making quite a bit of granola at my house lately. My brothers go crazy for the stuff. What they don't realize is that I start with whole-grain rolled oats and add in healthy stuff like wheat germ. Suckers. There is sugar involved, but not nearly as much as you would find in candy or baked goods. Except for maybe those tricksy recipes that use black beans.

Anyways. This is my personal version of granola, so I specifically engineered it to fit my tastes. It's heavy with nuts and seeds. I lightened it with a bit of crispy rice cereal (like Rice Krispies). I used slivered almonds instead of whole to achieve a more uniform texture. I left out the dried fruit because I don't enjoy the texture, but feel free to add it yourself. Sometimes I even change it up. I add pumpkin seeds instead of sunflower. I use maple syrup instead of honey. For my brother, occasionally I add cinnamon. Feel free to alter the recipe to fit your own likes and dislikes.


Sweet & Crisp Granola
Recipe by Sara (stuff-by-sara.blogspot.com)

2 cups rolled oats
1 cup crispy rice cereal (can substitute another cereal or more oats)
1 cup pecans
1 cup slivered almonds (or whole almonds, if you prefer)
1/2 cup hulled sunflower or pumpkin seeds (or some of each)
1/4 cup flax seeds or flax seed meal (I prefer milled flax seeds)
1/4 cup wheat germ

1/4 cup brown sugar
6 Tbsp honey, maple syrup, or *gasp* dark corn syrup
4 Tbsp butter
1/2 tsp salt
1 tsp cinnamon (optional)
1/2 tsp vanilla
1/4 tsp baking soda

1 cup dried fruit, such as raisins, berries, apricots, dates, bananas, apples, etc. (optional)

In a large bowl, combine oats, crispy rice cereal, pecans, almonds, sunflower and/or pumpkin seeds, flax seeds, and wheat germ. Set aside.

In a saucepan, combine brown sugar, honey or maple syrup, butter, salt, and cinnamon. Turn heat to medium-low. Cook until sugar dissolves and small bubbles form around the edges of the pan. Turn off heat, and add vanilla. Stir to combine. Add baking soda. Mix thoroughly. Pour the sugar mixture over the oat mixture. Toss to coat.

Spread mixture onto a lightly greased sheet pan. Bake in a 350ยบ oven for 10-20 minutes (closer to 10 minutes for a lightly chewy granola, 15 to 20 for more crunch). Add dried fruit if using. Stir granola to break up large clumps. Allow to cool.

Yogurt and granola - one of my favorite combinations.

Wednesday, July 17, 2013

Watercise! Tips for Working Out in the Pool

(source)
I pretty much love the water, especially in the summer. Bonus: I can get my work-out on in the pool!

Enter: Watercise! The swimming sensation that's sweeping the nation!

Just kidding. But with spectacles like Prancercise, it seemed a fitting title.

In all seriousness, there are many benefits of swimming, including lower impact on joints and increased muscle tone and strength due to the resistance of the water. For me, that translates into more bang for my buck with less pain. Bonus: I'm not hot and sweaty at the end of a work out. That makes the whole thing seem much more do-able.

Even more than the potential benefits, I actually enjoy swimming. In my opinion, this is the most important factor for establishing a consistent work-out routine.

I'll tell you what I mean.

Rewind a couple years. I signed up to run a 5k with some friends. I had a few months to prepare, so I faithfully got up in the mornings and jogged. I strictly adhered to a training schedule I found online (and a really easy one at that), but running/jogging just made me want to die. Seriously. I was always red-faced and out of breath. I didn't want to be embarrassed at my 5k, so I continued on. And on. And on. For three months.

Finally the day of my 5k arrived: I was a snail compared the rest of my team! Even after all that work!

So what did I do? I promptly stopped jogging. And I've never gone back. For a while I took long walks instead, but even that waned over time.

Now that it's summer, I've started swimming and water aerobics. Swimming is lovely. The water is both refreshing and relaxing. Basically, I love getting in the pool.

So what is my routine like? I usually start by walking a few laps. Yes, walking. This is more of a warm-up, but even walking in the pool can be more beneficial than walking around the block. Why? Water resistance. The resistance of the water helps to build and strengthen muscles. Which sounds wonderful to me.

I have a smallish above-ground pool, so I walk the circumference of it. I start by the ladder, walk once around clockwise, then when I get back to the ladder, I change directions. This keeps the water from forming a whirlpool that I can just coast on. Instead, I am working against the water, maximizing my work-out.

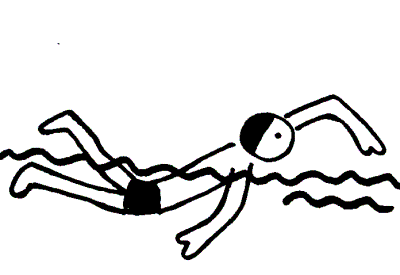
Next I do a few laps of whatever I feel like. I'm not really a swimmer in that I never learned how to swim. I just kind of flail my limbs until I get where I want to go. I probably look kind of goofy, like this guy:
(source)
But I don't let that bother me. I usually do about 10 laps of swimming regularly, then I switch to just swimming with my arms (keeping my legs straight behind me), then a few with just my legs (holding a kick board or some such). Maybe some backstroke thrown in there.

I also like to do some of the exercises in this Total Body Pool Workout. All you need is a beach ball. And, you know, a pool. My pool isn't deep enough for all of these exercises, but I do what I can. You can look up other exercises on the internets. I loves the internets!

I finish up by stretching. Not all stretches are convenient in the water, but here are some of my favorites:
 • Neck side stretches - Place your left hand on the top of your head and slowly tilt your head to the left. Apply gentle pressure with your hand to increase the stretch. Hold for 30 seconds. Repeat on your right side.
 • Calf stretch - Face the wall of the pool. Step back with your right foot, keeping your left toes next to the pool wall. You want your left leg bent and right leg straight. Make sure your right foot is flat on the pool floor. Keep your hands on the pool wall, and lean forward. Hold for 30 seconds, then switch to the left.
 • Shoulder stretch -  Bring your left arm across your body and hold it with your right arm, either above or below the elbow. Hold for about 30 seconds. Switch arms and repeat.

If you are considering moving your usual work-out to the pool, I suggest the following:

1. Stick with it, and don't get discouraged. Exercise only helps you if you do it! Of course, sometimes you will have setbacks. A few days ago I woke up to thunder and pouring rain. I was really looking forward to my pool time, but I had to postpone it. Sometimes life gets in the way, but do your best be consistent.

2. Remember something is better than nothing. Even if you just go out and swim a few laps, that's better than not doing anything at all.
(source)
3. Use sun protection. Again, my pool is outside, so I use plenty of sunscreen before heading out for a swim. If your hair gets sun-dry, try smoothing a little sunscreen through your hair. Works wonders. You can also put a little bit of conditioner on the ends if the chlorine tends to dry it out.

4. Buy some swimmer's ear drops. Without them, swimming would be just as miserable as running (for me).

5. Do whatever will make you more comfortable in the water. If you need a pool noodle or something else to hold on to, do so. If you like swim caps and goggles, wear them. I hear that some people like nose plugs and/or ear plugs.

6. Have fun! Maybe take a few underwater selfies while you're at it.

If swimming isn't your thing, try something else. But don't stick with any routine that makes the grim reaper seem like an attractive fella.

Wednesday, July 10, 2013

Stamped Washer Bracelets


Tonight, with the young women at my church, we made stamped washer bracelets. The girls had a good time with them, and their bracelets turned out really cute.

If you want to make your own, you'll need to gather a few supplies:
 • hammer
 • needle-nosed pliers
 • anvil (or you can go outside on the sidewalk)
 • metal stamps (1/4 inch)
 • washers (we used 2 different sizes--more on that later)
 • braiding cord and/or suede lace
 • cord clasps
 • beads or charms (optional)


I started out by going to the hardware store for some washers. I didn't pay much attention to the sizes, I just picked out some I liked. Washers are measured by the diameter of the hole in the middle. My washers are 1/2 inch and 3/8 inch.

On my big washer, I stamped my name. For this step, you'll need a hammer, metal stamps, and an anvil or sidewalk. Don't attempt to stamp your washers on a table, counter, or other surface. Lay your washer on the anvil or sidewalk, and proceed to stamp whatever combination of letters and/or numbers you like.

In the above picture, my name is a little shaky. That's because I've never used metal stamps before, so this was a case of trial and error. For my name, I made a series of taps with the hammer. Obviously, that wasn't wise.

For the small washer, I decided to stamp decorative lines. I used the capital letter "i" in my stamp set. The best way to make clear indents is to give each stamp one good, hard whack with a heavy hammer. My hammer was lightweight and girly, so I gave it 3 good whacks while holding the stamp steady. It worked much better than the sissy taps I tried on the large washer.

All the girls at church put the year they will graduate on the small washer. If you'd like to put something else significant to you, feel free. You could also leave this washer plain, if that is your preference.

To string the washers together, you will need braiding cord and/or suede lace. I found these in the craft section at Walmart. I'm sure somewhere like Hobby Lobby would have more selection, however. Measure your wrist (accounting for excess length due to the clasp), and cut your cord/lace accordingly. You'll want at least 3 or 4 strings of cord or lace. On my bracelet above, I used one strand of suede lace and two strands of braiding cord.

Lay your washers side-by-side, stamped side up. Separate your cord/lace into 2 groups. For the first group, I'll be using brown suede lace. You'll want the lace to go over and under the washers as shown in this picture:

My second group consisted of 2 strands of pink braiding cord. You'll want to string them the opposite as the first group, like this:

If you string your washers on your cord/lace like this, they will lay flat against your wrist.

If you would like any bead or charms on your bracelet, add them now. I didn't add any to mine, but I'm a simple girl.

Next, get out your cord clasps. Mine came in a package like this:
Again, I found these at Walmart. For my cord clasps, I fed the ends of my cord and lace into a small metal closure. I then used needle-nosed pliers to pinch the closure shut, trapping my lace and cords. These closures are attached to clasps, which I use to get my bracelet on and off.

After you pinch those shut, your bracelet is finished! Pat yourself on the back for making a piece of custom jewelry.

Here are some the girls made:


Enjoy!